In this chapter, you will learn about the different parts of a Flask application. You will also write and run your first Flask web application.
All Flask applications must create an application instance. The web server passes all requests it receives from clients to this object for handling, using a protocol called Web Server Gateway Interface (WSGI, pronounced “wiz-ghee”). The application instance is an object of class Flask, usually created as follows:
The only required argument to the Flask class constructor is the name of the main module or package of the application. For most applications, Python’s __name__ variable is the correct value for this argument.
The __name__ argument that is passed to the Flask application constructor is a source of confusion among new Flask developers. Flask uses this argument to determine the location of the application, which in turn allows it to locate other files that are part of the application, such as images and templates.
Later you will learn more complex ways to initialize an application, but for simple applications this is all that is needed.
Clients such as web browsers send requests to the web server, which in turn sends them to the Flask application instance. The Flask application instance needs to know what code it needs to run for each URL requested, so it keeps a mapping of URLs to Python functions. The association between a URL and the function that handles it is called a route.
The most convenient way to define a route in a Flask application is through the app.route decorator exposed by the application instance. The following example shows how a route is declared using this decorator:
The previous example registers function index() as the handler for the application’s root URL. While the app.route decorator is the preferred method to register view functions, Flask also offers a more traditional way to set up the application routes with the app.add_url_rule() method, which in its most basic form takes three arguments: the URL, the endpoint name, and the view function. The following example uses app.add_url_rule() to register an index() function that is equivalent to the one shown previously:
Functions like index() that handle application URLs are called view functions. If the application is deployed on a server associated with the www.example.com domain name, then navigating to http://www.example.com/ in your browser would trigger index() to run on the server. The return value of this view function is the response the client receives. If the client is a web browser, this response is the document that is displayed to the user in the browser window. A response returned by a view function can be a simple string with HTML content, but it can also take more complex forms, as you will see later.
Embedding response strings with HTML code in Python source files leads to code that is difficult to maintain. The examples in this chapter do it only to introduce the concept of responses. You will learn a better way to generate HTML responses in Chapter 3.
If you pay attention to how some URLs for services that you use every day are formed, you will notice that many have variable sections. For example, the URL for your Facebook profile page has the format https://www.facebook.com/, which includes your username, making it different for each user. Flask supports these types of URLs using a special syntax in theapp.route decorator. The following example defines a route that has a dynamic component: The portion of the route URL enclosed in angle brackets is the dynamic part. Any URLs that match the static portions will be mapped to this route, and when the view function is invoked, the dynamic component will be passed as an argument. In the preceding example, the name argument is used to generate a response that includes a personalized greeting.
The dynamic components in routes are strings by default but can also be of different types. For example, the route /user/<int:id> would match only URLs that have an integer in the id dynamic segment, such as /user/123. Flask supports the types string, int, float, and path for routes. The path type is a special string type that can include forward slashes, unlike the string type.
In the previous sections you learned about the different parts of a Flask web application, and now it is time to write your first one. The hello.py application script shown in Example 2-1 defines an application instance and a single route and view function, as described earlier.
If you have cloned the application’s Git repository on GitHub, you can now run git checkout 2a to check out this version of the application.
Flask applications include a development web server that can be started with the flask run command. This command looks for the name of the Python script that contains the application instance in the FLASK_APP environment variable.
To start the hello.py application from the previous section, first make sure the virtual environment you created earlier is activated and has Flask installed in it. For Linux and macOS users, start the web server as follows:
For Microsoft Windows users, the only difference is in how the FLASK_APP environment variable is set:
Once the server starts up, it goes into a loop that accepts requests and services them. This loop continues until you stop the application by pressing Ctrl+C.
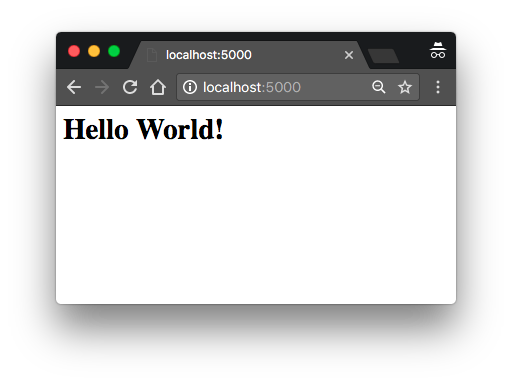
With the server running, open your web browser and type http://localhost:5000/ in the address bar. Figure 2-1 shows what you’ll see after connecting to the application.
hello.py Flask application
If you type anything else after the base URL, the application will not know how to handle it and will return an error code 404 to the browser—the familiar error that you get when you navigate to a web page that does not exist.
The web server provided by Flask is intended to be used only for development and testing. You will learn about production web servers in Chapter 17.
The Flask development web server can also be started programmatically by invoking the app.run() method. Older versions of Flask that did not have the flask command required the server to be started by running the application’s main script, which had to include the following snippet at the end:
While the flask run command makes this practice unnecessary, the app.run() method can still be useful on certain occasions, such as unit testing, as you will learn in Chapter 15.
The second version of the application, shown in Example 2-2, adds a second route that is dynamic. When you visit the dynamic URL in your browser, you are presented with a personalized greeting that includes the name provided in the URL.
If you have cloned the application’s Git repository on GitHub, you can now run git checkout 2b to check out this version of the application.
To test the dynamic route, make sure the server is running and then navigate to http://localhost:5000/user/Dave. The application will respond with the personalized greeting using the name dynamic argument. Try using different names in the URL to see how the view function always generates the response based on the name given. An example is shown in Figure 2-2.
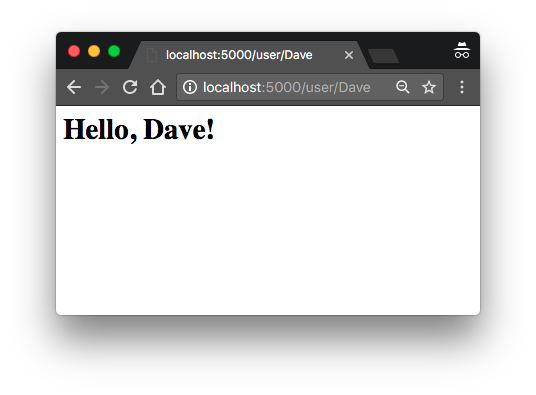
Dynamic route
Flask applications can optionally be executed in debug mode. In this mode, two very convenient modules of the development server called the reloader and the debugger are enabled by default.
When the reloader is enabled, Flask watches all the source code files of your project and automatically restarts the server when any of the files are modified. Having a server running with the reloader enabled is extremely useful during development, because every time you modify and save a source file, the server automatically restarts and picks up the change.
The debugger is a web-based tool that appears in your browser when your application raises an unhandled exception. The web browser window transforms into an interactive stack trace that allows you to inspect source code and evaluate expressions in any place in the call stack. You can see how the debugger looks in Figure 2-3.
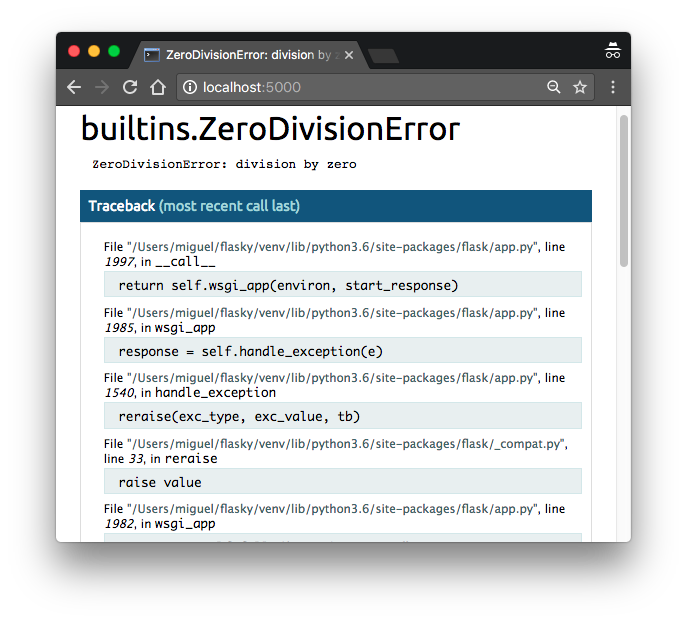
Flask debugger
By default, debug mode is disabled. To enable it, set a FLASK_DEBUG=1 environment variable before invoking flask run:
If you are using Microsoft Windows, use set instead of export to set the environment variables.
If you start your server with the app.run() method, the FLASK_APP and FLASK_DEBUG environment variables are not used. To enable debug mode programmatically, use app.run(debug=True).
Never enable debug mode on a production server. The debugger in particular allows the client to request remote code execution, so it makes your production server vulnerable to attacks. As a simple protection measure, the debugger needs to be activated with a PIN, printed to the console by the flask run command.
The flask command supports a number of options. To see what’s available, you can run flask --help or just flask without any arguments:
The flask shell command is used to start a Python shell session in the context of the application. You can use this session to run maintenance tasks or tests, or to debug issues. Actual examples where this command is useful will be presented later, in several chapters.
You are already familiar with the flask run command, which, as its name implies, runs the application with the development web server. This command has many options:
(venv) $ flask run --help
Usage: flask run [OPTIONS]

  Runs a local development server for the Flask application.

  This local server is recommended for development purposes only but it can
  also be used for simple intranet deployments.  By default it will not
  support any sort of concurrency at all to simplify debugging.  This can be
  changed with the --with-threads option which will enable basic
  multithreading.

  The reloader and debugger are by default enabled if the debug flag of
  Flask is enabled and disabled otherwise.

Options:
  -h, --host TEXT                 The interface to bind to.
  -p, --port INTEGER              The port to bind to.
  --reload / --no-reload          Enable or disable the reloader.  By default
                                  the reloader is active if debug is enabled.
  --debugger / --no-debugger      Enable or disable the debugger.  By default
                                  the debugger is active if debug is enabled.
  --eager-loading / --lazy-loader
                                  Enable or disable eager loading.  By default
                                  eager loading is enabled if the reloader is
                                  disabled.
  --with-threads / --without-threads
                                  Enable or disable multithreading.
  --help                          Show this message and exit.
The --host argument is particularly useful because it tells the web server what network interface to listen to for connections from clients. By default, Flask’s development web server listens for connections on localhost, so only connections originating from the computer running the server are accepted. The following command makes the web server listen for connections on the public network interface, enabling other computers in the same network to connect as well:
The web server should now be accessible from any computer in the network at http://a.b.c.d:5000, where a.b.c.d is the IP address of the computer running the server in your network.
The --reload, --no-reload, --debugger, and --no-debugger options provide a greater degree of control on top of the debug mode setting. For example, if debug mode is enabled, --no-debugger can be used to turn off the debugger, while keeping debug mode and the reloader enabled.
Now that you have played with a basic Flask application, you might want to know more about how Flask works its magic. The following sections describe some of the design aspects of the framework.
When Flask receives a request from a client, it needs to make a few objects available to the view function that will handle it. A good example is the request object, which encapsulates the HTTP request sent by the client.
The obvious way in which Flask could give a view function access to the request object is by sending it as an argument, but that would require every single view function in the application to have an extra argument. Things get more complicated if you consider that the request object is not the only object that view functions might need to access to fulfill a request.
To avoid cluttering view functions with lots of arguments that may not always be needed, Flask uses contexts to temporarily make certain objects globally accessible. Thanks to contexts, view functions like the following one can be written:
Note how in this view function, request is used as if it were a global variable. In reality, request cannot be a global variable; in a multithreaded server several threads can be working on different requests from different clients all at the same time, so each thread needs to see a different object in request. Contexts enable Flask to make certain variables globally accessible to a thread without interfering with the other threads.
A thread is the smallest sequence of instructions that can be managed independently. It is common for a process to have multiple active threads, sometimes sharing resources such as memory or file handles. Multithreaded web servers start a pool of threads and select a thread from the pool to handle each incoming request.
There are two contexts in Flask: the application context and the request context. Table 2-1 shows the variables exposed by each of these contexts.
| Variable name | Context | Description |
|---|---|---|
current_app | Application context | The application instance for the active application. |
g | Application context | An object that the application can use for temporary storage during the handling of a request. This variable is reset with each request. |
request | Request context | The request object, which encapsulates the contents of an HTTP request sent by the client. |
session | Request context | The user session, a dictionary that the application can use to store values that are “remembered” between requests. |
Flask activates (or pushes) the application and request contexts before dispatching a request to the application, and removes them after the request is handled. When the application context is pushed, the current_app and g variables become available to the thread. Likewise, when the request context is pushed, request and session become available as well. If any of these variables are accessed without an active application or request context, an error is generated. The four context variables will be covered in detail in this and later chapters, so don’t worry if you don’t understand why they are useful yet.
The following Python shell session demonstrates how the application context works:
In this example, current_app.name fails when there is no application context active but becomes valid once an application context for the application is pushed. Note how an application context is obtained by invoking app.app_context() on the application instance.
When the application receives a request from a client, it needs to find out what view function to invoke to service it. For this task, Flask looks up the URL given in the request in the application’s URL map, which contains a mapping of URLs to the view functions that handle them. Flask builds this map using the data provided in the app.route decorator, or the equivalent non-decorator version, app.add_url_rule().
To see what the URL map in a Flask application looks like, you can inspect the map created for hello.py in the Python shell. Before you try this, make sure that your virtual environment is activated:
The / and /user/<*name*> routes were defined by the app.route decorators in the application. The /static/<*filename*> route is a special route added by Flask to give access to static files. You will learn more about static files in Chapter 3.
The (HEAD, OPTIONS, GET) elements shown in the URL map are the request methods that are handled by the routes. The HTTP specification defines that all requests are issued with a method, which normally indicates what action the client is asking the server to perform. Flask attaches methods to each route so that different request methods sent to the same URL can be handled by different view functions. The HEAD and OPTIONS methods are managed automatically by Flask, so in practice it can be said that in this application the three routes in the URL map are attached to the GET method, which is used when the client wants to request information such as a web page. You will learn how to create routes for other request methods in Chapter 4.
You have seen that Flask exposes a request object as a context variable named request. This is an extremely useful object that contains all the information that the client included in the HTTP request. Table 2-2 enumerates the most commonly used attributes and methods of the Flask request object.
| Attribute or Method | Description |
|---|---|
form | A dictionary with all the form fields submitted with the request. |
args | A dictionary with all the arguments passed in the query string of the URL. |
values | A dictionary that combines the values in form and args. |
cookies | A dictionary with all the cookies included in the request. |
headers | A dictionary with all the HTTP headers included in the request. |
files | A dictionary with all the file uploads included with the request. |
get_data() | Returns the buffered data from the request body. |
get_json() | Returns a Python dictionary with the parsed JSON included in the body of the request. |
blueprint | The name of the Flask blueprint that is handling the request. Blueprints are introduced in Chapter 7. |
endpoint | The name of the Flask endpoint that is handling the request. Flask uses the name of the view function as the endpoint name for a route. |
method | The HTTP request method, such as GET or POST. |
scheme | The URL scheme (http or https). |
is_secure() | Returns True if the request came through a secure (HTTPS) connection. |
host | The host defined in the request, including the port number if given by the client. |
path | The path portion of the URL. |
query_string | The query string portion of the URL, as a raw binary value. |
full_path | The path and query string portions of the URL. |
url | The complete URL requested by the client. |
base_url | Same as url, but without the query string component. |
remote_addr | The IP address of the client. |
environ | The raw WSGI environment dictionary for the request. |
Sometimes it is useful to execute code before or after each request is processed. For example, at the start of each request it may be necessary to create a database connection or authenticate the user making the request. Instead of duplicating the code that performs these actions in every view function, Flask gives you the option to register common functions to be invoked before or after a request is dispatched.
Request hooks are implemented as decorators. These are the four hooks supported by Flask:
before_request
Registers a function to run before each request.
before_first_request
Registers a function to run only before the first request is handled. This can be a convenient way to add server initialization tasks.
after_request
Registers a function to run after each request, but only if no unhandled exceptions occurred.
teardown_request
Registers a function to run after each request, even if unhandled exceptions occurred.
A common pattern to share data between request hook functions and view functions is to use the g context global as storage. For example, a before_request handler can load the logged-in user from the database and store it in g.user. Later, when the view function is invoked, it can retrieve the user from there.
Examples of request hooks will be shown in future chapters, so don’t worry if the purpose of these hooks does not quite make sense yet.
When Flask invokes a view function, it expects its return value to be the response to the request. In most cases the response is a simple string that is sent back to the client as an HTML page.
But the HTTP protocol requires more than a string as a response to a request. A very important part of the HTTP response is the status code, which Flask by default sets to 200, the code that indicates that the request was carried out successfully.
When a view function needs to respond with a different status code, it can add the numeric code as a second return value after the response text. For example, the following view function returns a 400 status code, the code for a bad request error:
Responses returned by view functions can also take a third argument, a dictionary of headers that are added to the HTTP response. You will see an example of custom response headers in Chapter 14.
Instead of returning one, two, or three values as a tuple, Flask view functions have the option of returning a response object. The make_response() function takes one, two, or three arguments, the same values that can be returned from a view function, and returns an equivalent response object. Sometimes it is useful to generate the response object inside the view function, and then use its methods to further configure the response. The following example creates a response object and then sets a cookie in it:
Table 2-3 shows the most commonly used attributes and methods available in response objects.
| Attribute or Method | Description |
|---|---|
status_code | The numeric HTTP status code |
headers | A dictionary-like object with all the headers that will be sent with the response |
set_cookie() | Adds a cookie to the response |
delete_cookie() | Removes a cookie |
content_length | The length of the response body |
content_type | The media type of the response body |
set_data() | Sets the response body as a string or bytes value |
get_data() | Gets the response body |
There is a special type of response called a redirect. This response does not include a page document; it just gives the browser a new URL to navigate to. A very common use of redirects is when working with web forms, as you will learn in Chapter 4.
A redirect is typically indicated with a 302 response status code and the URL to go to given in a Location header. A redirect response can be generated manually with a three-value return or with a response object, but given its frequent use, Flask provides a redirect() helper function that creates this type of response:
Another special response is issued with the abort() function, which is used for error handling. The following example returns status code 404 if the id dynamic argument given in the URL does not represent a valid user:
Note that abort() does not return control back to the function because it raises an exception.
Flask is designed to be extended. It intentionally stays out of areas of important functionality such as database and user authentication, giving you the freedom to select the packages that fit your application the best, or to write your own if you so desire.
A great variety of Flask extensions for many different purposes have been created by the community, and if that is not enough, any standard Python package or library can be used as well. You will use your first Flask extension in Chapter 3.
This chapter introduced the concept of responses to requests, but there is a lot more to say about responses. Flask provides very good support for generating responses using templates, and this is such an important topic that the next chapter is dedicated to it.
Table of contents collapsed
Select a result to preview